ZWCAD, like most CAD applications, does not connect to WMS (Web Map Service) servers natively. If you need to overlay GIS map tiles - topographic maps, orthophotos, cadastral data, or national mapping agency layers - as a georeferenced background behind your DWG drawing, you need a plugin that establishes the WMS connection and reprojects the tiles into the drawing's local coordinate system.
This guide shows how to import WMS layers into ZWCAD in six steps using Automapki Application. The same workflow works identically in AutoCAD, BricsCAD, and GstarCAD.
What Is WMS and Why Add It to a CAD Drawing?
A WMS (Web Map Service) is an OGC-standardized protocol that delivers georeferenced map images from a server on demand. Unlike TMS (Tile Map Service) which serves pre-rendered square tiles, WMS servers accept bounding box requests and return custom-rendered map images at any scale and projection - making them ideal for precise CAD integration where your drawing's coordinate system may differ from the standard Web Mercator projection used by most tile services.
WMS is widely used by national mapping agencies, cadastral authorities, environmental agencies, and GIS infrastructure providers to publish authoritative map data. Adding a WMS layer to your ZWCAD drawing gives you a live, georeferenced map background that you can reference for site context, coordinate verification, and presentation overlays - without leaving the CAD environment.
How to Import WMS Layers into ZWCAD: Step-by-Step
📥 Install Automapki Application
Download and install Automapki Application for ZWCAD. After installation, restart ZWCAD to autoload the plugin. Automapki adds a dedicated ribbon tab and map service commands to your ZWCAD environment.
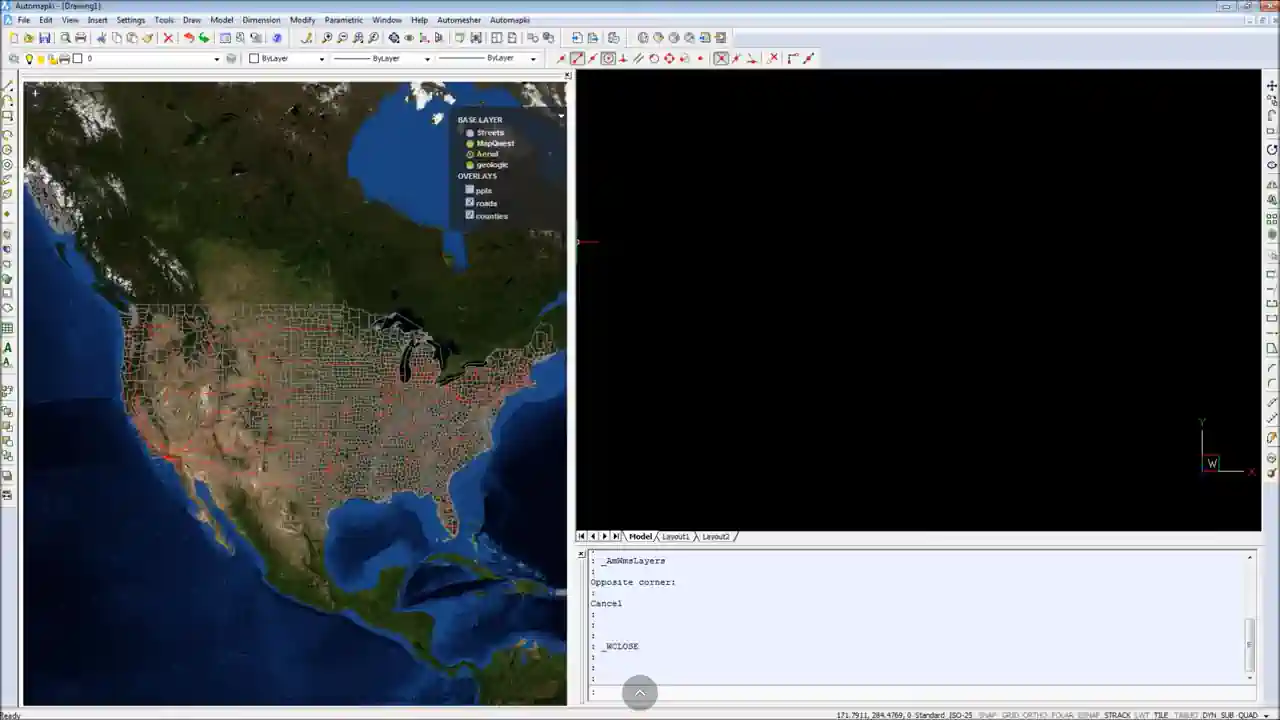
🚀 Open or Create a DWG Drawing

Launch ZWCAD and open an existing drawing or create a new one. The WMS tiles will be inserted into this drawing as georeferenced raster image objects aligned to your drawing's coordinate space.
🌎 Set the Base Coordinate Reference System
Run the AmSetCoordSys command or click Init Coord Sys in the Automapki ribbon. Select the coordinate reference system that matches your DWG drawing from the library of over 3,000 predefined options - national grids, UTM zones, state planes, and local projections.
This step is critical. WMS servers serve data in a geographic coordinate system (typically WGS84 or Web Mercator), while your DWG drawing uses a local projected CRS. Automapki reprojects the WMS tiles from the server's CRS into your drawing's coordinate space automatically - but only if you assign the correct CRS first. An incorrect CRS will place the tiles in the wrong location relative to your drawing geometry.
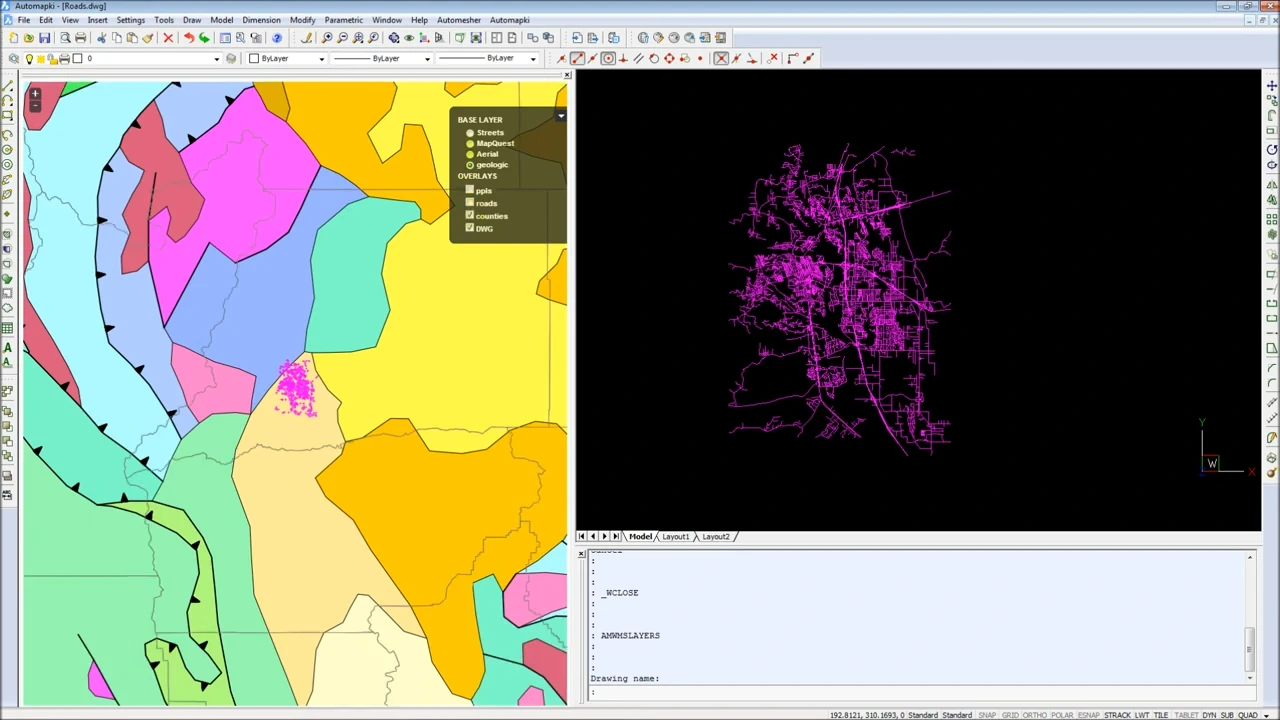
🆕 Add the WMS Service URL
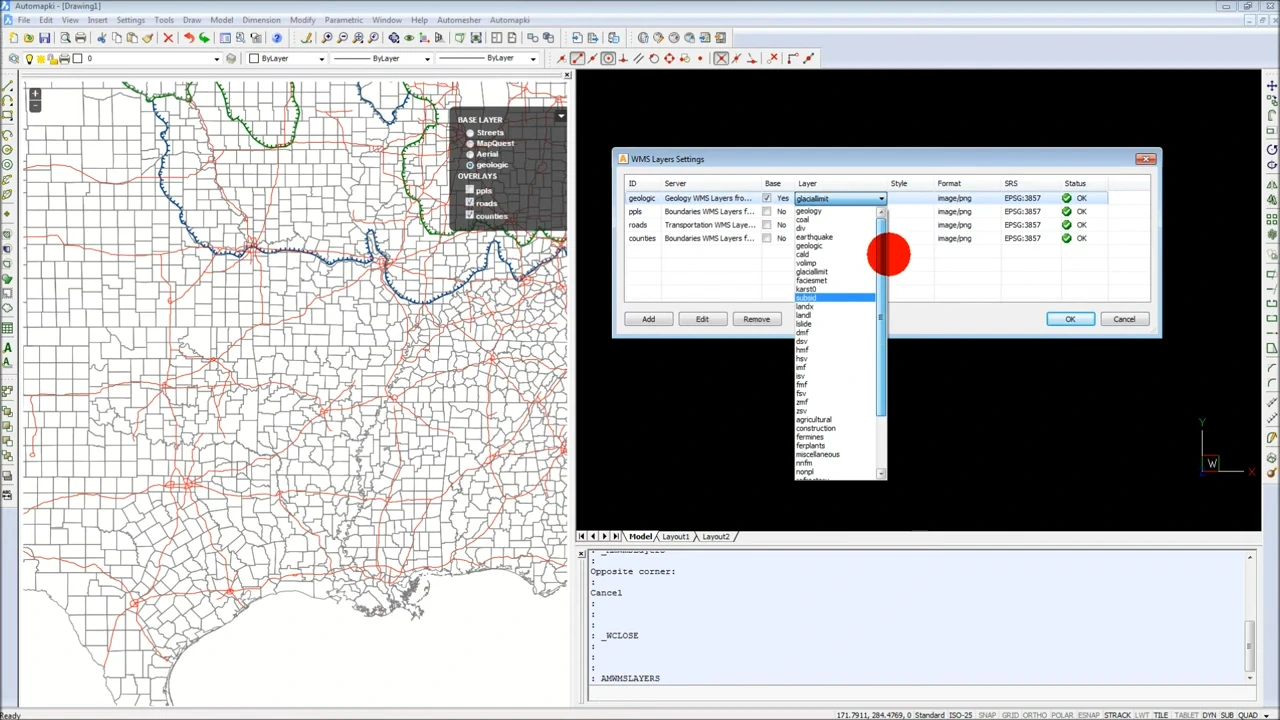
Run the AmWmsLayers command or click Manage WMS Layers in the Automapki ribbon. Enter your WMS server URL in the format:
https://your-wms-server.com/wms?SERVICE=WMS&VERSION=1.3.0Automapki connects to the server and retrieves the available map layers. Select the layers you want to display - individual or multiple layers can be combined in a single request. Popular WMS sources include national mapping agencies (Ordnance Survey, IGN, USGS, BKG), cadastral authorities, environmental agencies, and Esri's ArcGIS Server WMS endpoints.
▶️ Preview in the Map Browser
Run the AmShowBrowser command to open the map browser panel. This panel shows a live preview of the WMS layers and lets you toggle layer visibility, adjust transparency, and verify alignment before inserting tiles into the drawing.
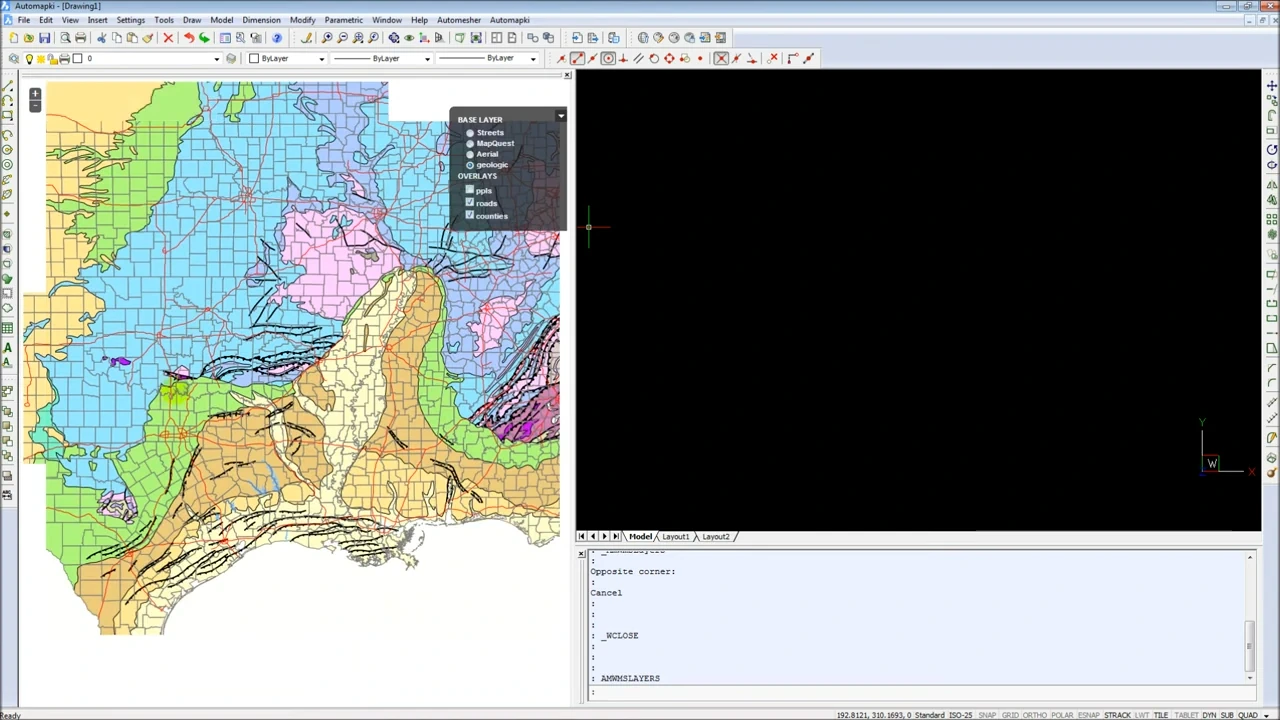
⏬ Insert WMS Tiles into the DWG
Run the AmInsertTileImages command or click Insert Tile Images in the Automapki ribbon. Select the map area to fill with tiles - typically the current drawing extents or a specific site boundary. Automapki downloads the WMS map images and inserts them as georeferenced raster objects in the DWG model space at the correct scale and position.
The inserted tiles are saved in the DWG file and visible even without an internet connection when the file is reopened. To refresh with updated imagery, re-run AmInsertTileImages for the same area.
WMS vs TMS: Which Should You Use?
Automapki supports both WMS and TMS (Tile Map Service) connections. The right choice depends on your data source:
- WMS - use when your map data comes from official GIS servers (national agencies, cadastral authorities, ArcGIS Server), where the data is served as vector-rendered map images in specific projections. WMS is better for precise coordinate-system alignment and for accessing data that is only published via OGC-standard services.
- TMS - use when your map data comes from consumer tile services (Google Maps, Bing Maps, OpenStreetMap). TMS delivers pre-rendered JPEG/PNG tiles and is typically faster to load. See the TMS tile map guide for that workflow.
Frequently Asked Questions
-
Does ZWCAD support WMS natively?
Standard ZWCAD does not connect to WMS servers without additional software. Automapki Application adds WMS and TMS connectivity to ZWCAD (and AutoCAD, BricsCAD, GstarCAD) with coordinate system reprojection built into the tile download process.
-
Why do WMS tiles appear in the wrong location in my ZWCAD drawing?
This is caused by an incorrect coordinate reference system assignment in Step 3. The tiles are being projected from the WMS server's CRS into the wrong local coordinate space. Reassign the correct CRS that matches your DWG drawing and re-run AmInsertTileImages.
-
Can I use any WMS server, or only specific ones?
Any OGC WMS 1.1.1 or 1.3.0 compliant server works. Enter the WMS url in the AmWmsLayers dialog and Automapki retrieves the available layers automatically. This includes national mapping agencies, Esri ArcGIS Server WMS endpoints, GeoServer, MapServer, and any other standards-compliant WMS implementation.
-
Are the WMS tiles saved in the DWG file permanently?
Yes. The tiles are embedded as raster image objects in the DWG file and remain visible when the file is reopened without an internet connection. Re-running AmInsertTileImages fetches fresh tiles from the WMS server to update the imagery.
-
Is there a free trial?
Yes. Automapki Application is available as a free evaluation download with no time limit on the trial period.
Summary
Adding WMS GIS layers to ZWCAD requires a coordinate system assignment and a WMS server connection - Automapki handles both in six steps. The result is a georeferenced map background embedded in the DWG, correctly aligned with your drawing geometry, and available in ZWCAD, AutoCAD, BricsCAD, and GstarCAD. Any OGC-compliant WMS endpoint is supported.
👉 Ready to add WMS layers? Download Automapki Application and try it free.