Looking to expand AutoCAD's 3D file import and export capabilities? This step-by-step tutorial shows you exactly how to manually load Automesher Application into AutoCAD on Windows. Whether you're working with STL, OBJ, SKP, or other 3D formats, Automesher adds seamless mesh conversion capabilities to AutoCAD. Follow this guide to get the plugin running in just a few minutes - no prior experience needed.
Manually Loading the Automesher AutoCAD Plugin: Step-by-Step
-
Open Windows File Explorer
Launch Windows File Explorer. Use the keyboard shortcut Win + E for quick access.
-
Navigate to the Automesher Plugin Folder
In the File Explorer address bar, enter the following path and press Enter:
%ProgramFiles%\Autodesk\ApplicationPlugins\Automesher.bundle\This opens the Automesher plugin installation directory.
-
Open the AutoCAD Version Subfolder
Inside the
Automesher.bundledirectory, open the subfolder that matches your installed version of AutoCAD. -
Drag and Drop the ARX File into AutoCAD
Drag the
Automesher.arxfile from the folder and drop it directly into your active AutoCAD drawing window. This immediately loads the plugin without any additional steps. -
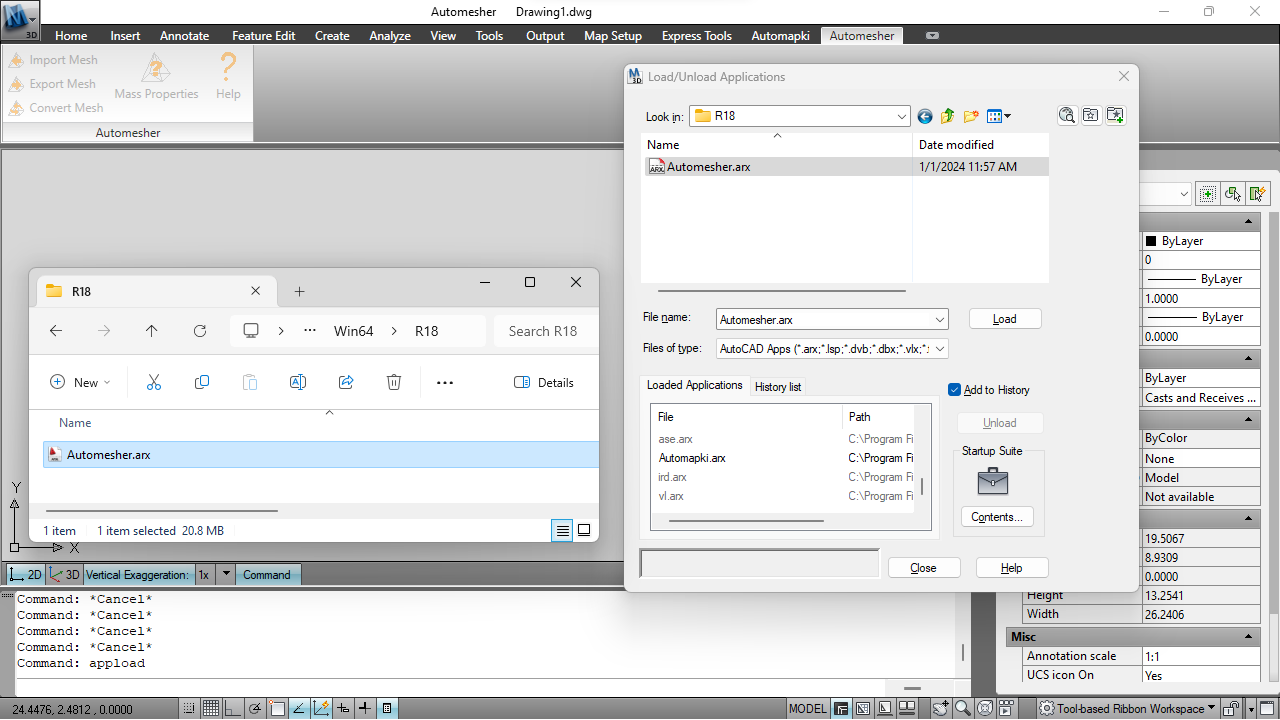
Load Automesher Using the APPLOAD Command
Alternatively, type APPLOAD in the AutoCAD command line, then browse to the
Automesher.arxfile and select it to load the plugin through AutoCAD's built-in application loader.
Summary: Automesher Plugin Loaded in AutoCAD
Following this tutorial, you have successfully installed and loaded the Automesher plugin into AutoCAD. This add-on enables direct conversion between popular 3D formats - including SKP, STL, OBJ, PLY, and more - without leaving your AutoCAD environment. Whether you used the drag-and-drop ARX method or the APPLOAD command, Automesher is now ready to extend AutoCAD's 3D file compatibility.
👉 Unlock better 3D file handling in AutoCAD today with Automesher - the plugin that streamlines mesh conversion and broadens AutoCAD's support for CAD and 3D file formats.