Importing 3D models into AutoCAD often works - but textures don't survive the process. Standard mesh import in AutoCAD produces polyface mesh entities that don't support texture mapping, so models imported from SketchUp, Blender, or Rhino arrive as grey, untextured geometry regardless of how the source file was set up.
This guide shows how to import SKP, OBJ, DAE, and 3DM files with textures into AutoCAD, BricsCAD, ZWCAD, and GstarCAD using Automesher Application - specifically using the SubDMesh entity type, which is the only AutoCAD entity type that supports texture mapping.
Why Textures Disappear When Importing 3D Models into AutoCAD
AutoCAD supports several entity types for 3D geometry: 3D Solids, Polyface Meshes, Surfaces, 3D Faces, and SubDMesh objects. Of these, only SubDMesh supports texture mapping with UV coordinates. When you import a textured OBJ or SKP file as a Polyface Mesh - which is the default behavior in many import workflows - the geometry comes in correctly but AutoCAD has no way to display the textures, because Polyface Mesh entities don't support material texture assignment.
Importing as SubDMesh preserves the UV coordinate data from the source file, creates proper AutoCAD materials linked to the texture image files, and enables textured rendering in AutoCAD's visual styles and render engine.
How to Import Textured 3D Models into AutoCAD: Step-by-Step
📥 Install Automesher Application

Download and install Automesher Application for your CAD platform - AutoCAD, BricsCAD, ZWCAD, or GstarCAD. After installation, restart your CAD application to autoload the plugin. Automesher adds the AmImportMesh command and a dedicated ribbon tab to your CAD environment.
🚀 Open Your Target DWG Drawing
Launch AutoCAD (or BricsCAD, ZWCAD, or GstarCAD) and open the DWG drawing where you want to place the textured model. The imported geometry and materials will be added to this drawing.
📂 Run AmImportMesh and Select Your File
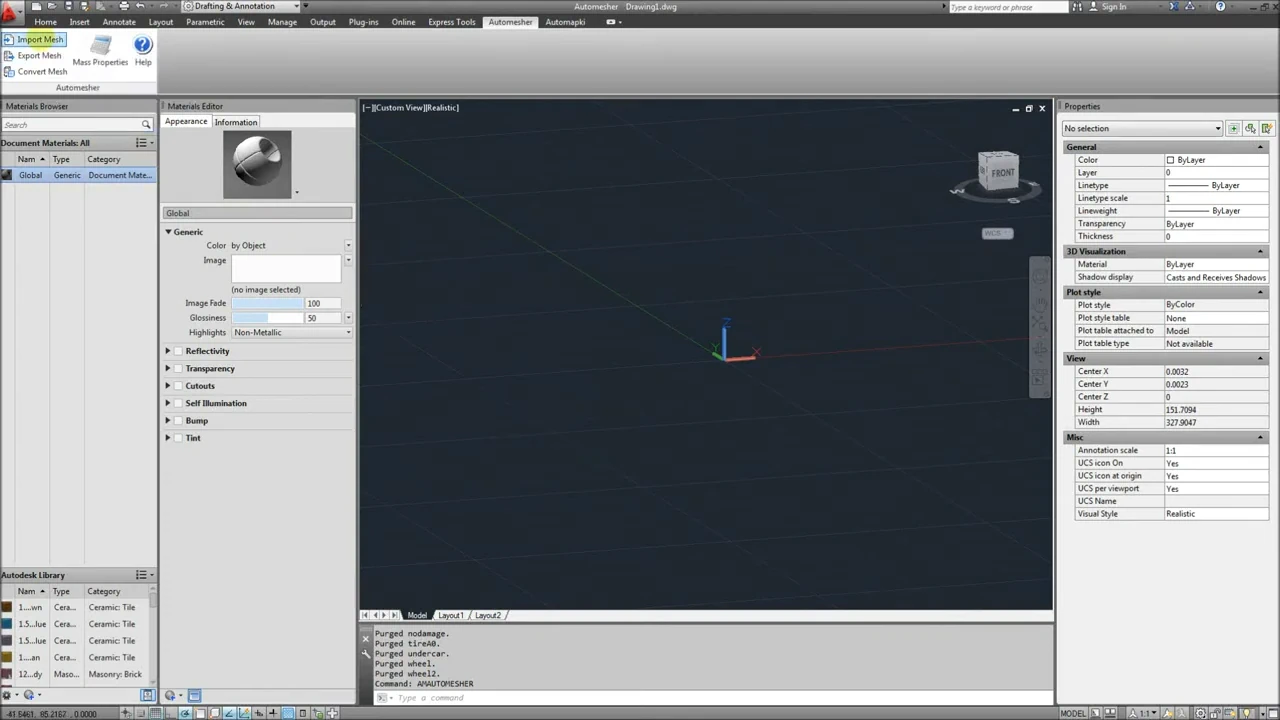
Type AmImportMesh in the command line and press Enter, or click Import Mesh in the Automesher ribbon. In the file browser, select the format and source file:
- SKP - SketchUp models with embedded textures (all Rhino versions)
- OBJ - Wavefront OBJ with MTL material file and texture images
- DAE - Collada files with embedded or referenced textures
- 3DM - Rhinoceros 3D models with material and texture assignments
For OBJ imports, make sure the MTL file and all referenced texture image files are in the same folder as the OBJ file before importing - Automesher reads the MTL to locate the textures.
🧊 Select SubDMesh as the Entity Type
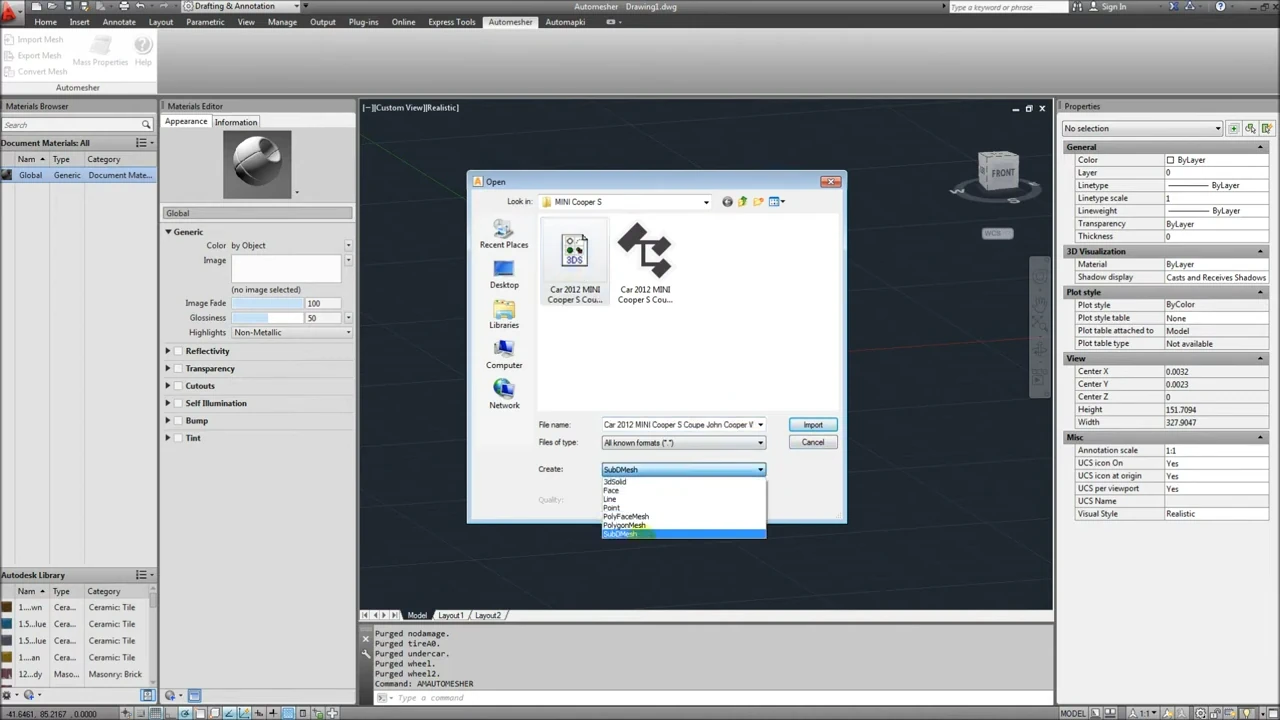
This is the critical step. In the entity type selection, choose SubDMesh. This is the only AutoCAD entity type that supports UV-mapped texture rendering. Do not use Polyface Mesh, 3D Solid, or 3D Face if you need textures to display - only SubDMesh preserves texture mapping.
Click Open to complete the import. Automesher reads the geometry, UV coordinates, material definitions, and texture image references from the source file and places the SubDMesh object in the AutoCAD model space.
🧱 Edit and Manage Texture Materials
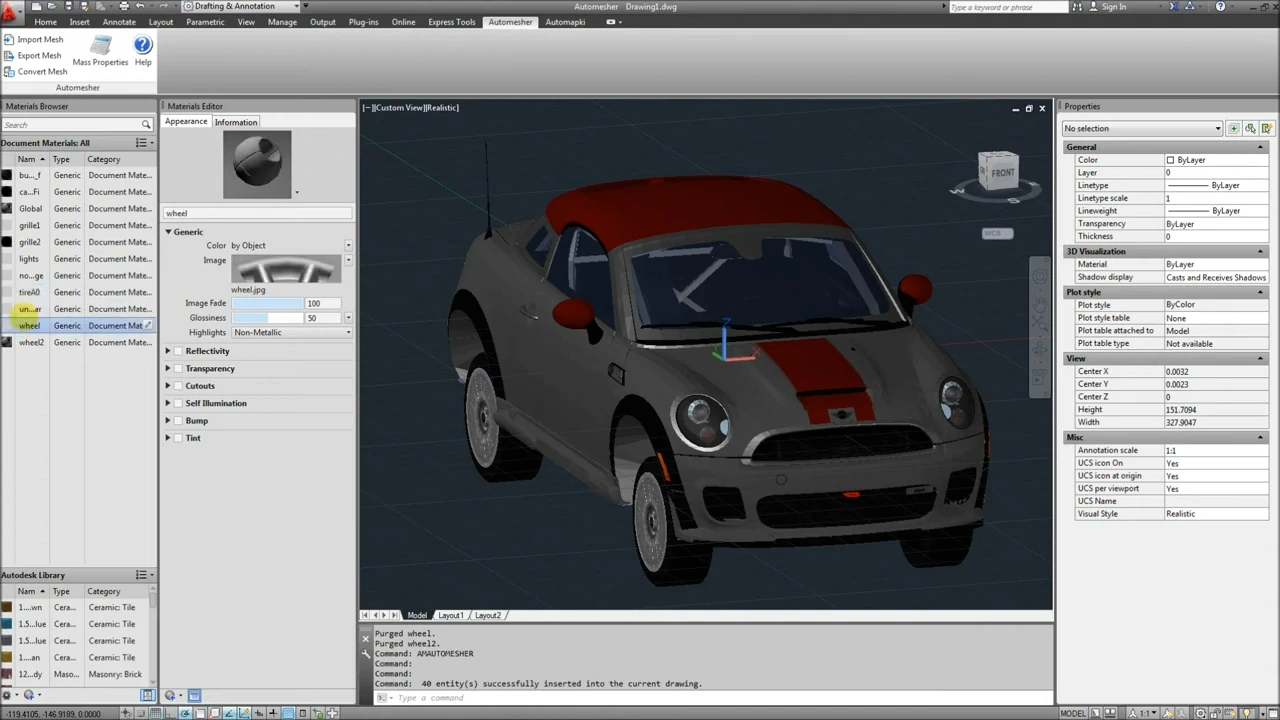
After import, each texture from the source file is automatically created as an AutoCAD material in the current drawing. You can view, edit, and reassign these materials using the AutoCAD Materials Browser (MATBROWSEROPEN command). To see textures in the viewport, switch to the Realistic visual style (type VSCURRENT and select Realistic).
Texture image files are referenced by path - if you move the DWG or the texture images to a different location, update the material paths in the Materials Browser to restore texture display.
Frequently Asked Questions
-
Why are textures not showing after import into AutoCAD?
The two most common causes are: (1) the model was imported as Polyface Mesh instead of SubDMesh - only SubDMesh supports texture mapping in AutoCAD, so re-import and select SubDMesh as the entity type; (2) the viewport is set to a non-textured visual style - switch to Realistic visual style to see textures.
-
Do texture image files need to be in a specific location?
For OBJ imports, the MTL file and all texture images must be in the same folder as the OBJ file at import time. For SKP, textures are embedded in the file so no external files are needed. After import, AutoCAD references textures by their stored file path - if you move the files, update the paths in the Materials Browser.
-
Can I import textured models into BricsCAD, ZWCAD, or GstarCAD with texture support?
Yes. Automesher Application runs identically in AutoCAD, BricsCAD, ZWCAD, and GstarCAD. The SubDMesh entity type and texture import workflow are the same in all four platforms.
-
Can I edit the imported textures inside AutoCAD?
Yes. Each imported texture becomes an AutoCAD material that you can edit in the Materials Browser - change the texture image, adjust tiling, modify the diffuse color, or reassign the material to different geometry using standard AutoCAD material editing tools.
-
How many free imports does the trial version allow?
The free evaluation version of Automesher Application supports up to 20 mesh imports. The full licensed version provides unlimited imports.
Summary
The key to importing 3D models with textures into AutoCAD is the entity type selection: only SubDMesh supports UV-mapped texture rendering. Automesher Application handles the full import pipeline - geometry, UV coordinates, material creation, and texture linking - for SKP, OBJ, DAE, and 3DM source files, in AutoCAD, BricsCAD, ZWCAD, and GstarCAD.
👉 Ready to import? Download Automesher Application and try it free for up to 20 imports.