Standard AutoCAD cannot open ESRI SHP shapefiles directly. If you need to bring GIS data from ArcGIS, QGIS, or another GIS platform into an AutoCAD drawing as editable geometry, you need a plugin that handles both the file format conversion and the coordinate system reprojection.
This guide shows how to import SHP into AutoCAD in four steps using Automapki Application, which works as a native plugin inside AutoCAD, BricsCAD, ZWCAD, and GstarCAD. All point, polyline, and polygon geometry is imported as standard AutoCAD entities, and attribute data from the SHP's DBF file is brought in as block attributes.
Why Coordinate System Selection Matters
ESRI shapefiles store coordinates in a defined geographic or projected coordinate reference system (CRS) - typically WGS84, a national grid, UTM zone, or a local projection. AutoCAD drawings use a unitless coordinate space with no built-in geographic reference.
When you import a SHP file, Automapki reprojects the shapefile coordinates from the SHP's CRS into the DWG drawing's coordinate space. Selecting the correct CRS in Step 3 is what makes the imported geometry land at the right scale and position in the drawing. An incorrect CRS will produce geometry that is either in the wrong location, impossibly small, or off the edge of the drawing space entirely.
How to Import SHP to AutoCAD: Step-by-Step
📥 Install Automapki Application
Download and install Automapki Application for your CAD platform - AutoCAD, BricsCAD, ZWCAD, or GstarCAD. After installation, restart your CAD application. Automapki adds a dedicated ribbon tab and command set for map import and export.
🚀 Run AmImportMap Command
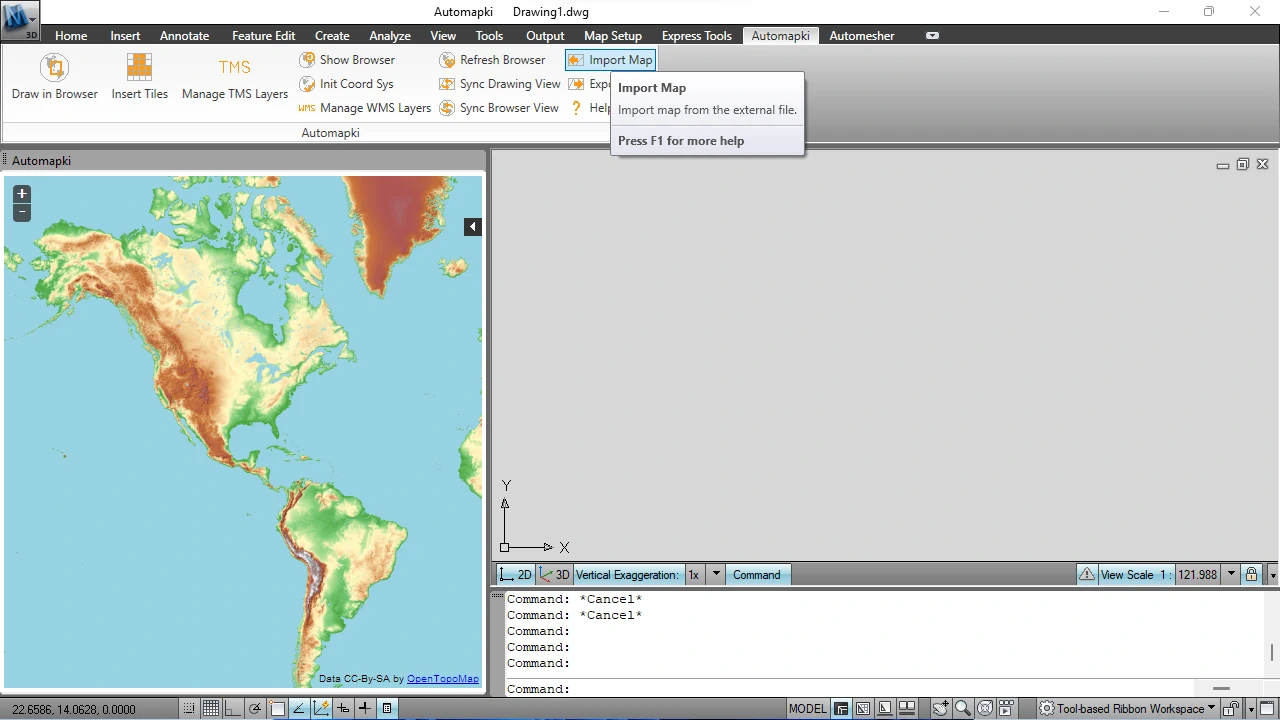
Open your target DWG drawing in AutoCAD. Type AmImportMap in the command line and press Enter, or click the Import Map button in the Automapki ribbon. This opens the import dialog.
🌎 Select Coordinate Reference System
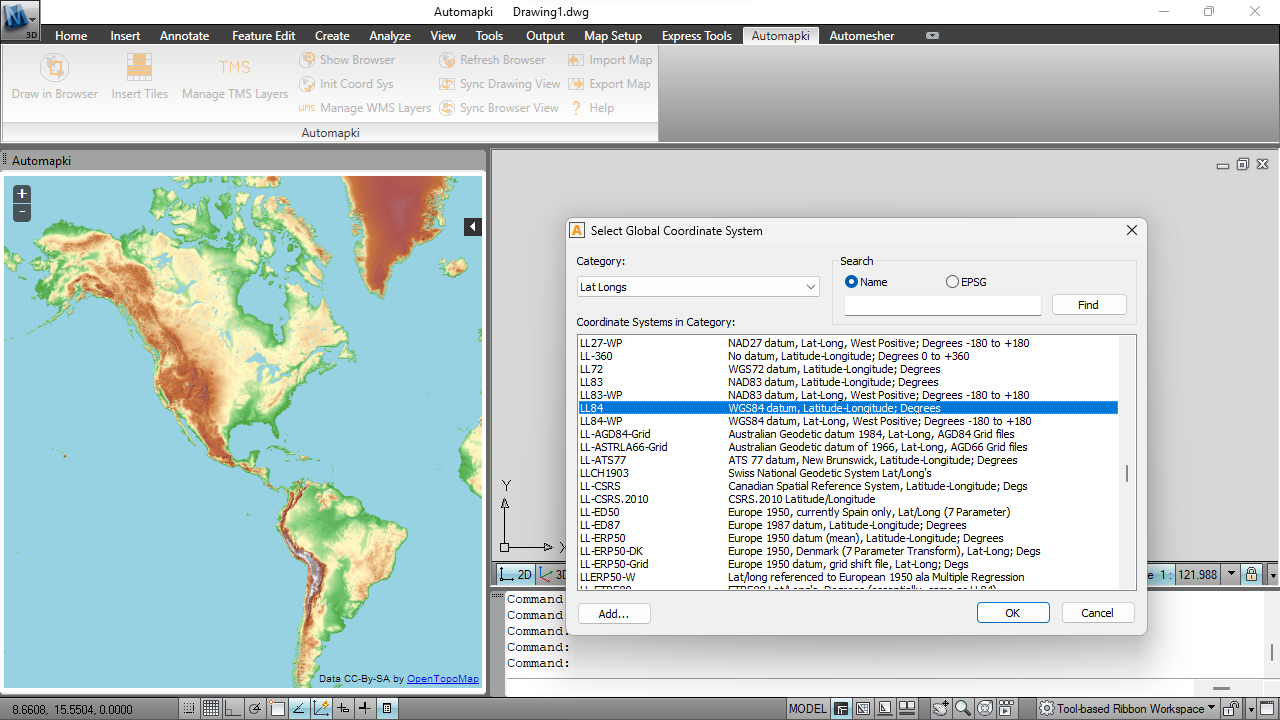
Choose the coordinate reference system that matches your SHP file from the library of over 3,000 predefined options - national grids, state planes, UTM zones, WGS84, and local projections.
The correct CRS is usually recorded in the SHP file's .prj file - open it in a text editor to read the CRS definition. If no PRJ file is present, check with the GIS team or data supplier who provided the shapefile. Selecting the wrong CRS is the most common reason imported geometry appears displaced or at the wrong scale in the drawing.
📂 Select Your SHP File and Import
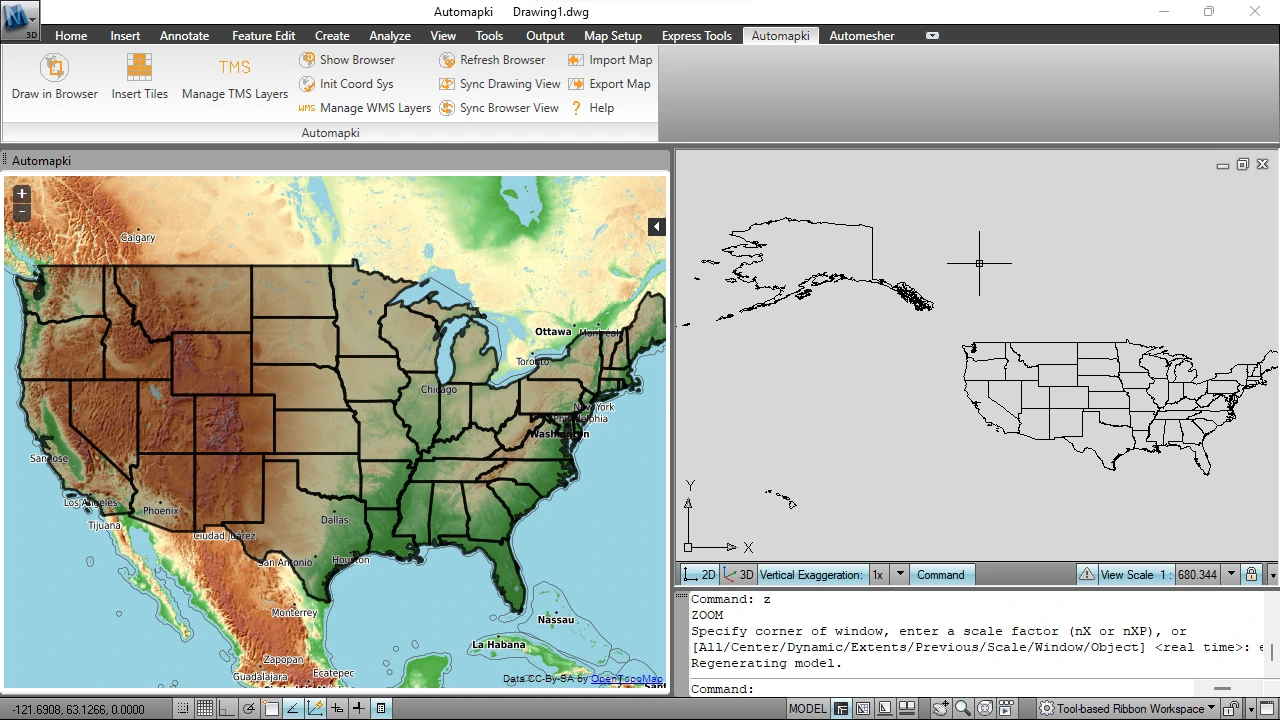
Browse to your .shp file and click Open. Automapki reads the shapefile and imports all geometry into the active DWG drawing model space:
- Point features are imported as AutoCAD point or block objects
- Polyline features are imported as AutoCAD polyline objects
- Polygon features are imported as closed AutoCAD polylines or region objects
- Attribute data from the SHP's DBF file is attached as block attributes or entity properties
Each SHP feature type is placed on a separate AutoCAD layer, preserving the GIS data's organizational structure inside the drawing.
Frequently Asked Questions
-
Can AutoCAD open SHP files natively?
Standard AutoCAD cannot open SHP shapefiles without a plugin. AutoCAD Map 3D and Civil 3D include limited GIS import tools, but these are not available in standard AutoCAD. Automapki adds full SHP import with coordinate system reprojection to standard AutoCAD, BricsCAD, ZWCAD, and GstarCAD.
-
Why does imported SHP geometry appear in the wrong location in AutoCAD?
This is caused by an incorrect coordinate reference system selection in Step 3. The SHP coordinates are being reprojected from the wrong source CRS. Check the SHP's .prj file for the correct CRS definition, reassign it in the import dialog, and re-import.
-
Will the SHP attribute data be accessible inside AutoCAD after import?
Yes. Attribute data from the SHP's DBF file is attached to the imported entities as block attributes or entity properties, accessible via the AutoCAD Properties panel and filterable using standard selection commands.
-
Can I import multiple SHP files into the same drawing?
Yes. Run the AmImportMap command multiple times to import additional SHP files into the same DWG. Each import can use a different layer assignment to keep datasets organized within the drawing.
-
Can I also export the DWG back to SHP after editing?
Yes. Automapki supports bidirectional conversion - use the AmExportMap command to export DWG geometry back to SHP format. See the DWG to SHP export guide for details.
-
Is there a free trial?
Yes. Automapki Application is available as a free evaluation download with no time limit on the trial period.
Summary
Importing ESRI SHP shapefiles into AutoCAD requires coordinate system reprojection - without it, geometry appears displaced or at the wrong scale in the drawing. Automapki handles the reprojection from a library of 3,000+ reference systems, converts all geometry types to native AutoCAD entities, and preserves attribute data from the SHP's DBF file. The same workflow runs identically in AutoCAD, BricsCAD, ZWCAD, and GstarCAD.
👉 Ready to import? Download Automapki Application and try it free.