GLTF files for dense 3D models - detailed architectural scans, large product assemblies, or high-polygon game assets - can easily reach tens or hundreds of megabytes. Draco is an open-source geometry compression library developed by Google that reduces GLTF file sizes by 5–10x by compressing vertex positions, normals, and UV coordinates, with virtually no visible loss of quality at normal viewing distances.
This guide shows how to export GLTF with Draco compression in four steps using Autoconverter, covering both GLTF (.gltf) and binary GLB (.glb) output, and explaining which compression level to choose for different use cases.
What Is Draco Compression for GLTF?
Draco is a geometry compression codec integrated into the GLTF 2.0 specification as the KHR_draco_mesh_compression extension. Instead of storing raw floating-point vertex data, Draco quantizes and entropy-encodes the mesh buffers, dramatically reducing the size of the geometry data in the GLTF binary. The compressed data is decoded by the viewer at load time - all major GLTF viewers and game engines (Three.js, Babylon.js, Unity, Unreal Engine, model-viewer) support Draco-compressed GLTF natively.
Draco compression works on geometry data only - textures are stored separately and are not affected by the Draco codec. For maximum total file size reduction, combine Draco geometry compression with texture compression (KTX2/Basis Universal), but Draco alone typically reduces the mesh buffer by 60–90%.
How to Export GLTF with Draco Compression: Step-by-Step
📂 Open Your 3D File in Autoconverter
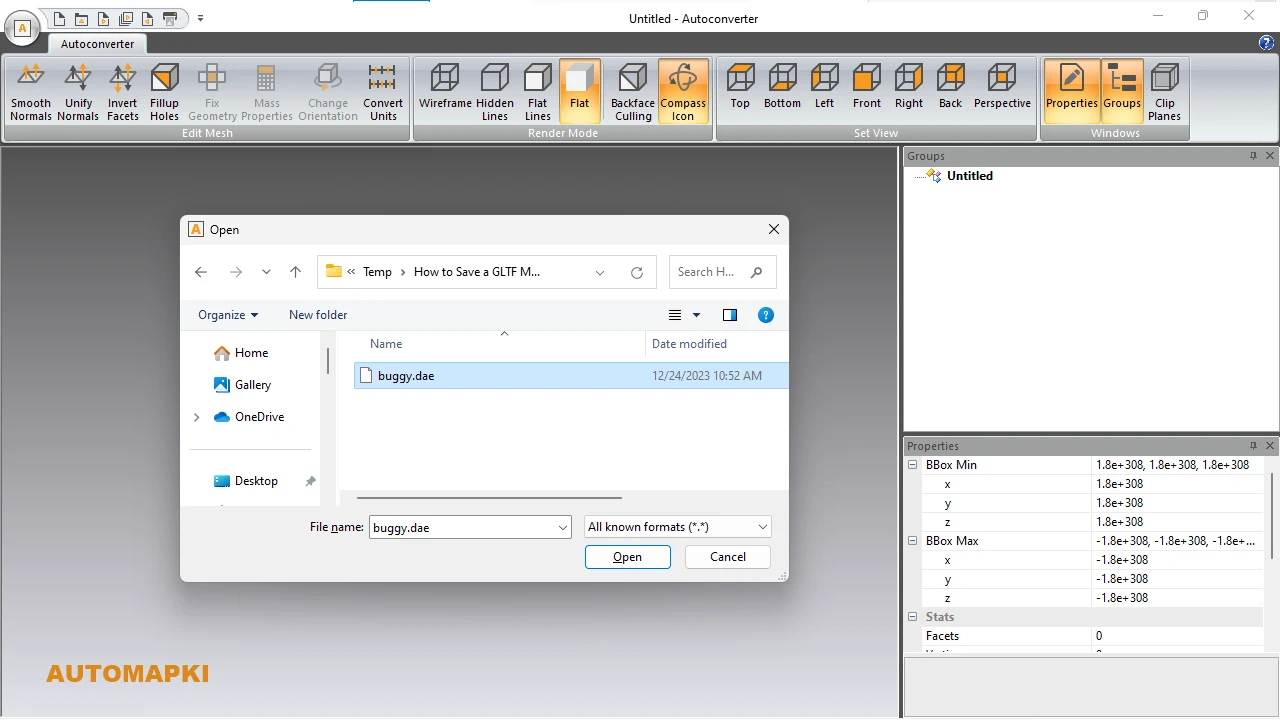
Download Autoconverter and install it on Windows. Click Open... and load your source 3D file - OBJ, STL, FBX, DAE, SKP, 3DM, STEP, or any other supported format. The model loads into the 3D viewport for inspection before export.
📄 Select GLTF as the Output Format
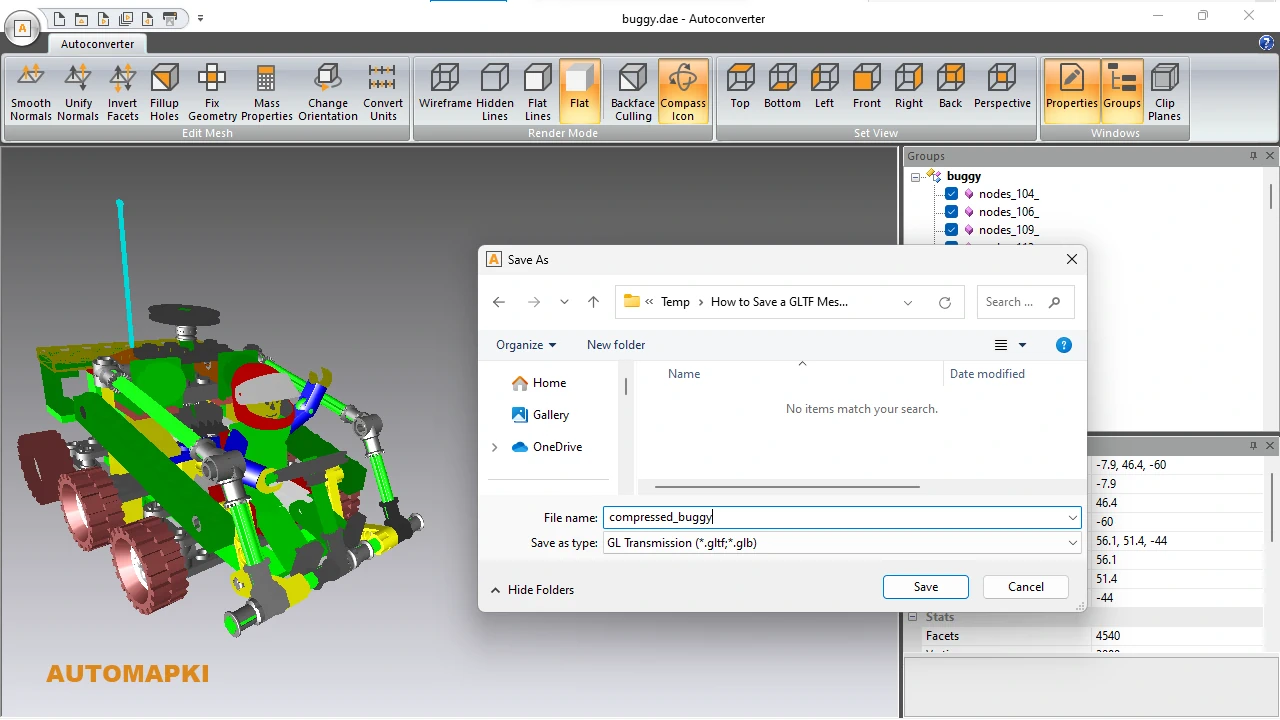
Click Save As... and select GLTF from the file type dropdown. Choose between:
- .gltf - text-based JSON file with separate binary buffer (.bin) and texture files; best when you need to inspect or edit the file structure
- .glb - binary single-file format that bundles geometry, materials, and textures in one package; preferred for web delivery, AR, and sharing
GLB is the standard choice for web and mobile delivery - it eliminates separate file dependencies and works directly with Three.js and all major GLTF runtimes.
🎛️ Set the GLTF Version and Draco Compression Level
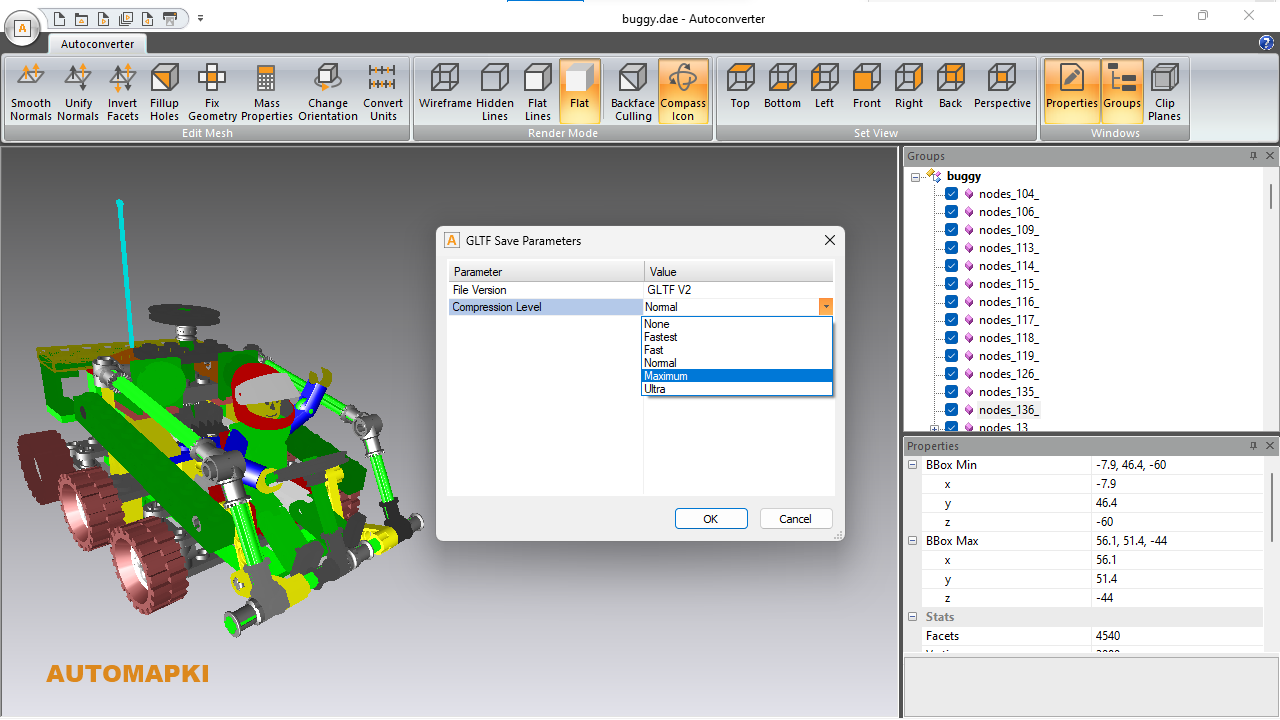
In the GLTF Save Parameters dialog, first confirm the version is set to GLTF V2 - Draco compression is only available in GLTF 2.0, not GLTF 1.0. Then select your compression level:
- None - no compression; full-precision raw geometry. Use for production pipelines where downstream tools may not support Draco, or where maximum editing fidelity is needed.
- Fastest - light compression; minimal CPU overhead at load time. Use when compatibility with older or non-standard Draco decoders is a concern.
- Normal - balanced default; good compression ratio with fast decode. The right choice for most web and mobile use cases.
- Maximum - higher compression; slightly longer encode/decode time. Use for large models where bandwidth matters more than marginal load time.
- Ultra - smallest possible file size; highest encode time. Use for very large scan data, complex architectural models, or any case where file size is the top priority.
💾 Save the Compressed GLTF File
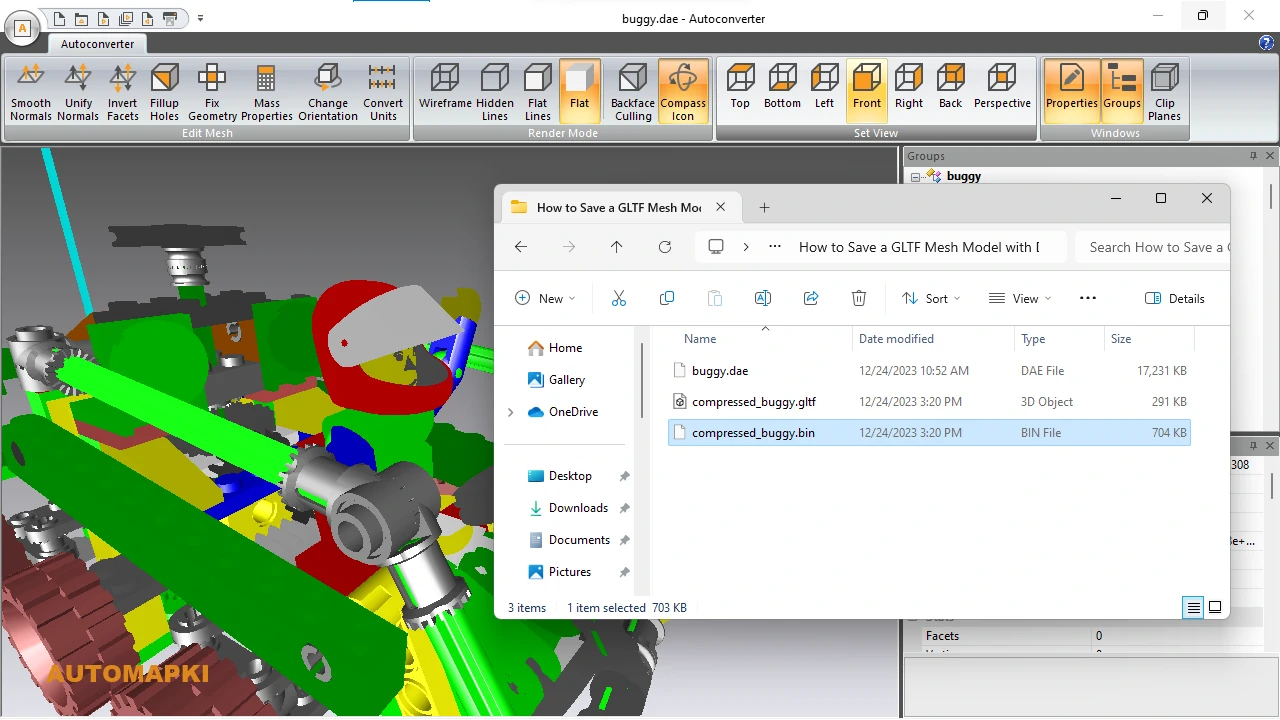
Click OK in the parameters dialog, then click Save. Autoconverter encodes the geometry with Draco and writes the GLTF or GLB file. Compare the output file size to the uncompressed version - for a dense mesh, the compressed GLB is typically 5–10x smaller than an equivalent uncompressed GLTF.
Frequently Asked Questions
-
Does Draco compression reduce visual quality?
Draco uses quantization, which is technically lossy - but at the default precision settings, the geometric difference between compressed and uncompressed geometry is sub-millimeter for most models and invisible at normal viewing distances. For engineering or manufacturing workflows requiring exact vertex positions, use the None level or a different format (STL, STEP, OBJ).
-
Is Draco-compressed GLTF supported by Three.js and Babylon.js?
Yes. Both Three.js and Babylon.js support Draco-compressed GLTF natively via the DRACOLoader extension. The model-viewer web component also supports Draco. Unity and Unreal Engine support Draco-compressed GLTF import as well.
-
What is the difference between .gltf and .glb output?
GLTF (.gltf) is a text-based JSON file with separate binary buffer and texture files. GLB (.glb) is a single binary file that packages all data together. For web and mobile delivery, GLB is preferred - it eliminates file dependency issues and is easier to host and serve. Both support Draco compression.
-
Can I compress an existing GLTF file with Draco?
Yes. Open the existing GLTF or GLB file in Autoconverter (it reads both formats) and re-export with Draco compression enabled. This applies Draco compression to a previously uncompressed GLTF file.
-
Is there a free trial?
Yes. The free evaluation version of Autoconverter supports up to 10 file conversions. The full licensed version provides unlimited conversions and batch processing.
Summary
Draco compression reduces GLTF and GLB file sizes by 5–10x with negligible visual quality loss, making it the standard approach for web, AR, and mobile 3D delivery. Autoconverter exports Draco-compressed GLTF from any supported input format in four steps - open the file, select GLTF output, choose compression level, save. Use Normal for general web delivery, Ultra for large scan data, and None when downstream tools don't support Draco.
👉 Ready to compress? Download Autoconverter and try it free for up to 10 conversions.